Brining chicken is a time, honored technique that guarantees moist, flavorful results every time. Whether you’re grilling, roasting, or frying, a good brine can transform your poultry dishes into culinary delights. In this comprehensive guide, we’ll walk you through the ultimate chicken brine recipe, step by step, while providing tips, variations, and expert advice to ensure your chicken is always the star of the meal.
Step 1: Preparing the Brine Solution
Step 1: Preparing the Brine Solution
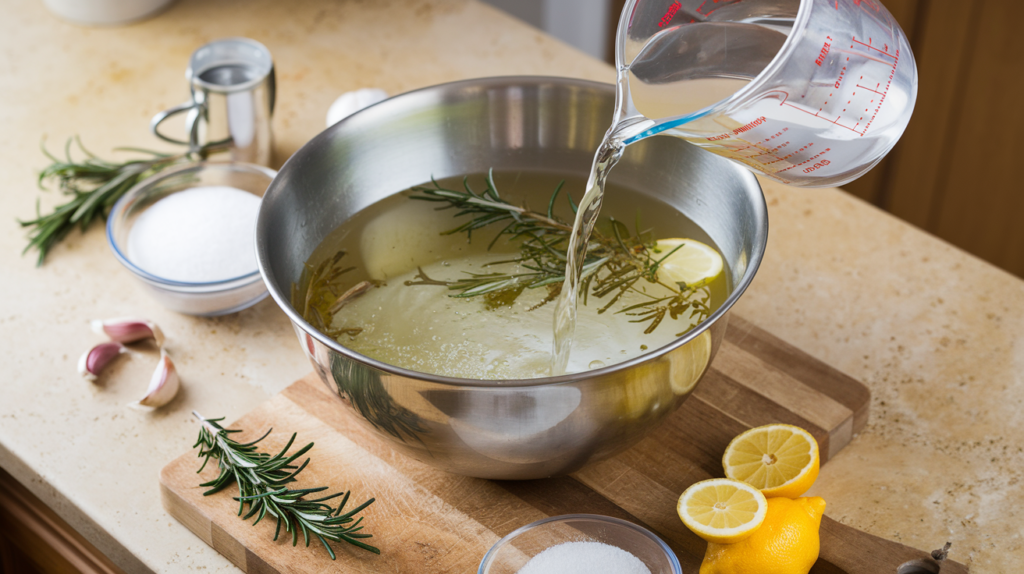
The first step in creating your brine is to prepare the brine solution. Begin by dissolving salt and sugar in water. Using warm water helps the salt and sugar dissolve more quickly and completely, ensuring that your brine is effective. A basic ratio for your brine is 1 cup of salt and 1/2 cup of sugar per gallon of water, but you can adjust these measurements depending on your taste preferences and the quantity of chicken you plan to brine.
To enhance the flavor profile, consider adding herbs and spices at this stage. Ingredients like crushed garlic, fresh rosemary, thyme, bay leaves, and black peppercorns can impart delightful flavors to your chicken. If you’re feeling adventurous, you can even add a splash of apple cider vinegar or lemon juice for an extra kick. The beauty of brining is that it allows for personalization—feel free to experiment with different flavor combinations.

Step 2: Cooling the Brine
Once the salt and sugar have fully dissolved, it’s crucial to allow the brine to cool completely before adding your chicken. If you skip this step, you risk partially cooking the chicken, which can lead to undesirable texture changes. To cool the brine quickly, you can transfer it to a larger bowl filled with ice water or simply allow it to sit at room temperature until it reaches a safe temperature.
This step is not only vital for food safety but also ensures that the brine penetrates the chicken effectively, enhancing its flavor and moisture. Always use cold brine for best results.

Step 3: Brining the Chicken
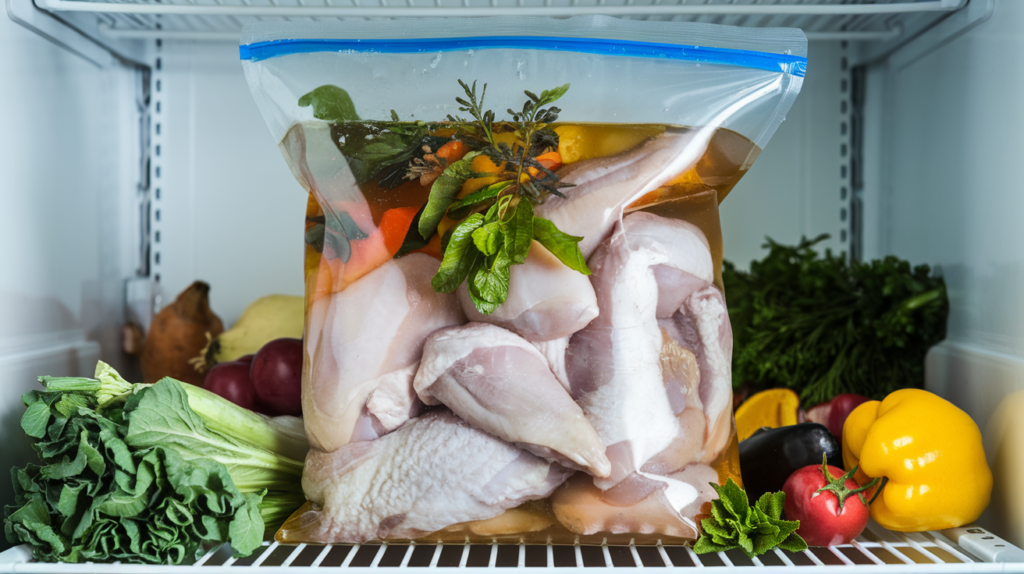
Now that your brine is prepared and cooled, it’s time to brine the chicken. Choose a large resealable plastic bag or a bowl big enough to hold your chicken and the brine. If you’re brining chicken breasts, wings, or thighs, you can use any combination, but make sure they are all of similar size for even brining.
Carefully place the chicken in the bag or bowl and pour the cooled brine over the chicken, ensuring that each piece is fully submerged. If necessary, you can add more water to cover the chicken entirely. Seal the bag tightly or cover the bowl with plastic wrap and refrigerate.
Brining Time:
- Chicken breasts: 1 to 2 hours
- Chicken thighs: 2 to 4 hours
- Chicken wings: 1 to 2 hours
Avoid over-brining, as this can lead to overly salty chicken. Remember, the goal is to enhance the flavor and moisture, not to overwhelm it.

Step 4: Rinsing and Drying the Chicken
After the brining time is complete, it’s essential to rinse the chicken thoroughly under cold water. This step removes any excess salt and ensures that your chicken isn’t overly salty after cooking. After rinsing, pat the chicken dry with paper towels. This is a crucial step for achieving crispy skin if you’re roasting or frying your chicken.
Drying the chicken not only helps with browning but also prevents the brine from being diluted during cooking. A dry surface allows for better seasoning application and improves texture, so don’t skip this step!

Step 5: Cooking the Brined Chicken
Your brined chicken is now ready to be cooked using your preferred method. Whether you choose to roast, grill, fry, or bake, you’ll notice a significant improvement in flavor and moisture. Here are a few cooking methods to consider:
- Grilling: Brined chicken wings are perfect for the grill. Cook them over medium heat until they reach an internal temperature of 165°F (75°C). The brine helps keep them juicy while the grill imparts a delicious smoky flavor.
- Roasting: For a whole brined chicken, preheat your oven to 375°F (190°C). Roast until the skin is golden brown and the juices run clear, typically around 1 to 1.5 hours, depending on the size.
- Frying: Buttermilk brined chicken is especially delicious when fried. Heat oil in a deep fryer or large skillet and cook until golden brown and crispy.
Each cooking method brings out the best in your brined chicken, providing different flavors and textures.

Key Takeaways
- Moisture Retention: Brining ensures that chicken stays moist and flavorful during cooking.
- Flavor Customization: You can easily customize your brine with various herbs, spices, and other ingredients.
- Cooking Versatility: Brined chicken can be cooked in numerous ways, enhancing its taste no matter the method.
Variations and Twists
Brining isn’t a one-size-fits-all method. Here are some exciting variations to try:
- Brine for Chicken Wings: Use a simple brine with salt, sugar, and a dash of hot sauce for spicy wings. This adds a nice kick and ensures they stay juicy during cooking.
- Buttermilk Brined Chicken: For a twist on traditional brining, use buttermilk instead of a saltwater brine. The acidity in buttermilk tenderizes the meat while adding a subtle tang.
- Smoked Chicken Brine: Infuse your brine with liquid smoke or smoked paprika to complement smoked chicken dishes. This adds depth and enhances the overall flavor.
- Herb-Infused Brine: Try different herbs based on the season. For instance, in the summer, you might add basil and lemon, while in the fall, thyme and sage would be perfect for a cozy flavor profile.
Tips for Perfecting Your Chicken Brine
- Timing is Key: Follow the recommended brining times carefully to avoid overly salty chicken.
- Use Quality Ingredients: Opt for kosher salt and fresh herbs for the best flavor. Avoid table salt, which can make brining less effective due to its fine granules.
- Experiment: Don’t be afraid to adjust the ingredients in your brine to match the flavors you enjoy. Brining is as much about personal preference as it is about technique.
Conclusion
Brining chicken is a simple yet effective way to elevate your culinary game. With this ultimate chicken brine recipe, you can create juicy, flavorful chicken breasts, wings, and thighs every time. The process allows for personalization, so feel free to experiment with different herbs, spices, and cooking methods. Whether you’re hosting a summer barbecue or preparing a weeknight dinner, brined chicken is sure to impress.
Try this technique and let us know how it turns out in the comments below! Your feedback helps us improve and share more delicious recipes.
FAQ Section
How long should you brine chicken?
Brining times vary by cut: chicken breasts take about 1–2 hours, thighs 2–4 hours, and wings 1–2 hours.
Can I use flavored brine?
Absolutely! You can infuse your brine with different flavors, like citrus, garlic, or even soy sauce for a savory twist.
Do I need to rinse chicken after brining?
Yes, rinsing removes excess salt from the surface of the chicken, preventing it from becoming overly salty.
Is it safe to brine chicken overnight?
Brining chicken overnight is generally safe for whole chickens, but for smaller cuts like breasts or wings, it’s best to limit the brining time to avoid saltiness.
Can I reuse brine?
It’s not recommended to reuse brine as it may contain bacteria from the raw chicken. Always discard the brine after use.

